How to Install a CorPlug and Repair an Abandoned Floor Core
Installation consists of grinding slots in the existing floor, applying fire-rated sealant, and installing the plug assembly (CorPlug) flush with the existing floor.

Tools Needed:
- Approved eye protection & NIOSH respirator
- 4” or 4 ½” electric grinder fitted with a 4” or 4.5” masonry grinding disc
- Sponge, rags or paper towels
- Caulking gun
- Vaccum for dust control
- CorPlug Hole Repair KIT
(1 CorPlug in specified size, 1 tube of 3M Fire Barrier CP25WB+ sealant, 1 wooden spreader, 1 pair disposable gloves, 1 carpenter's pencil, 1 page detailed Installation Instruction sheet)
Detailed Install Procedure
Determine diameter of abandoned core to be filled.
Obtain CorPlug Repair Kit in appropriate size.
1. Dry fit CorPlug in core.
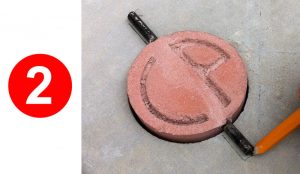
2. Draw an outline of the rods extending out from the CorPlug to determine location of slots to be ground in floor adjacent to core.
3. Remove CorPlug and set aside.
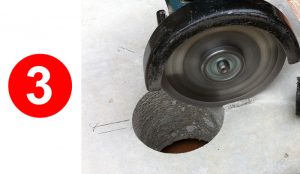
4. Using grinder, grind slots in floor approximately 5/16” deep and of a sufficient length to allow the plug assembly to rest slightly below surface of floor.
5. Dry fit CorPlug to be sure entire assembly rests below surface of floor.
6. Remove CorPlug.
7. Wipe out the walls of the existing hole with a damp sponge, rag or paper towel.
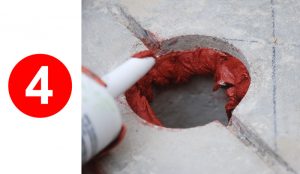
8. Apply a bead of sealant (approx. ½” thick) ½” below the top of the hole. Use the provided spreader to spread the sealant approximately ½” thick around the entire circumference of the hole.
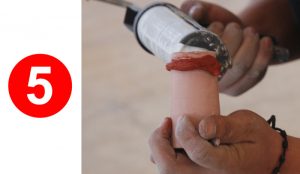
9. Apply a bead of Sealant (approx. ½” thick) around the circumference of the CorPlug ½” above the bottom of the CorPlug. Spread the sealant approximately ½” thick around the entire circumference of the CorPlug.
10. Insert the CorPlug using a twisting motion into the core so that the rods rest in the previously ground slots to allow the entire CorPlug assembly to rest slightly below the surface of the floor.
11. Use the spreader to level and remove any sealant that protrudes above the surface of the floor. In order to facilitate post installation inspection, be careful to not cover the CorPlug logo.
WARRANTY AND LIMITED REMEDY
CorPlug, Inc. warrants this product to be free of defects in materials and manufacture for 90 days from the date of purchase. Since methods of installation and on-site conditions are beyond CorPlug, Inc.’s control and could affect performance, CorPlug, Inc. makes no other warranties, express or implied, including warranties of MERCHANTABILITY AND FITNESS FOR A PARTICULAR PURPOSE. With respect to this product, CorPlug, Inc.’s sole obligation shall be, at its option, to replace or refund the purchase price of this product.
CorPlug, Inc. will not be liable for any loss or damage arising from the product, whether direct, indirect, special, incidental or consequential, regardless of the legal theory asserted.
CorPlug Install
Brief Install Instructions:

Determine the core size

Draw rod outline

Grind slots for rod

Apply sealant to Hole

Apply sealant to CorPlug

Final Installation
Testing
CorPlug has been tested for compressive strength in accordance with ASTM C-109 Mod. (28-day 9000 PSI) and slant sheer in accordance with ASTM C-882 Mod. (28-day 2600 PSI). Sealant has been Firestop tested up to 2 hours in accordance with ASTM E 814-13a (UL 1479)
